Market - responsive Newsletter with Template Builder
a module based template with Template Builder
Thank you for purchasing my item. If you have any questions that are beyond the scope of this help file, please use my knowledge base as starting point. Thanks so much!
General
The Template includes several ready-made HTML files. But to use its whole potential you may use the Template Builder
How to Start
in your zip file you can found next to the 'documentation.zip', the 'jpgs.zip' and the 'png_psd.zip' these folders:
Host it on your own webspace
- Upload these folders to your webspace (make sure all required images stay available until your recipients will read the newsletter)
- You can use the Template Builder to generate your Template easily by going to the '_templatebuilder' folder via your browser (http://yourdomain.tld/_templatebuilder)
- Or you can manually choose one of the prebuild template files (.html) and edit them with an texteditor
Use "My Template Builder" online
If you don't have an own webspace or you have troubles get the Template Builder running you can use "My Template Builder". Go to this section to get started
HTML Structure
This theme is a fixed layout with one columns. The HTML code has been tested for all major mail applications. I’ve tested this extensively and it meets every major standard for email templates out there. The HTML templates have been tested on Gmail, Yahoo Mail, Hotmail, GMX, AOL Mail, Apple Mail, Microsoft Outlook 2003 and 2010 and Thunderbird as well. The general template structure is the same throughout the template.
Here is the general structure:
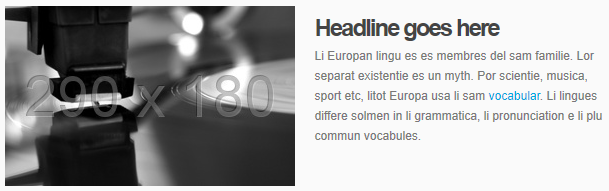
<!-- 1/2 Image left start --> <table width="600" cellpadding="0" cellspacing="0"> <tr> <td valign="top"> <table width="600" cellpadding="0" cellspacing="0"> <tr> <!-- CONTENT start --> <td width="290" valign="top" align="left"> <img src="IMAGEPATH" alt="" title="" width="290" height="180" border="0" style="max-width:290px;"> </td> <td width="20"> </td> <td width="290" valign="top" align="left"> <div class="h">Headline goes here</div> <div> Li Europan lingu es es membres del sam familie... </div> </td> <!-- CONTENT end --> </tr> </table> </td> </tr> </table> <!-- 1/2 Image left end -->
Which represents this:
The Template Builder 2
With this template you get the Template Builder. Make sure you upload all the files to your server first or check out "My Template Builder".
Check out the Tour for the Template Builder
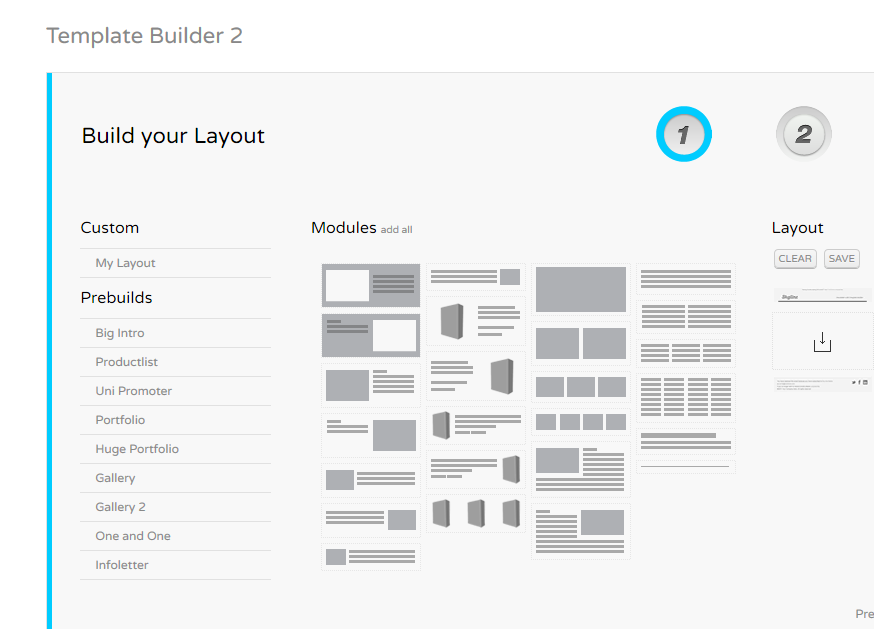
It's easy to work with the Template Builder:
1. Build your Layout
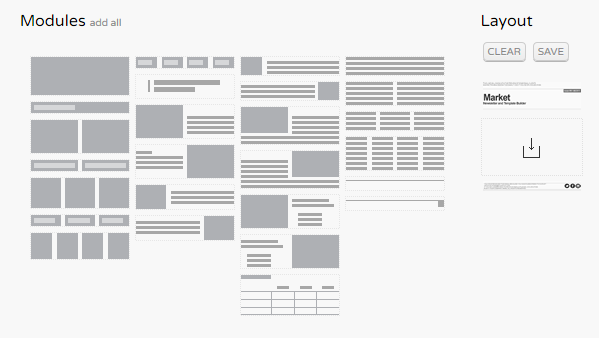
First you have to build your layout. You can click on of the prebuilds or drag 'n drop modules into the dropzone on the right.
You can reorder the layout and save it.
2. Precise the Template
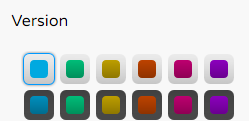
Specify more options in step 2. Choose one version you would like to use.
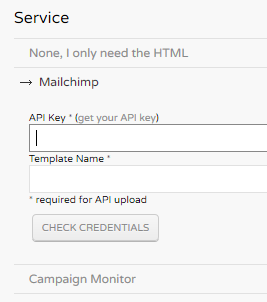
If you would like to use a service like Mailchimp or Campaignmonitor you have to enter an API key.
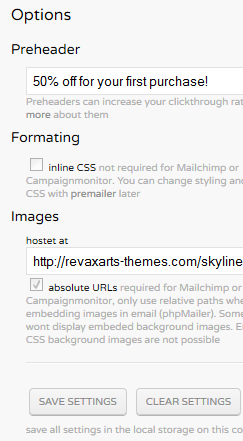
Define your preheader to display a custom text in the preview area of the email clients
If you need just the HTML you can deside to get an inline CSS version or the embedded version
Choose absolute URLs if you need absolute pathes for the images
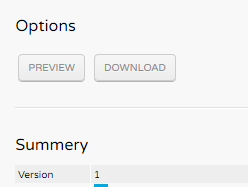
3. Get the HTML
If you have uploaded all the files correctly your HTML is shown in the textfield. You can edit, preview or download the HTML.
If you use a service you can directly upload it to it's dashboard
MyMail Newsletter Plugin
This Template works with the MyMail Email Newsletter Plugin for WordPress
With MyMail you're able to send track and create, send and track your Newsletter Campaigns

Visit mymail.newsletter-plugin.com
In the download package your can find a zip file called
market_for_mymail.zip
To install the plugin:
- Get the MyMail Newsletter Plugin exclusive on CodeCanyon
- Follow the installation instruction for the Plugin and activate it.
- Goto Newsletter => Templates
- Upload the zip file

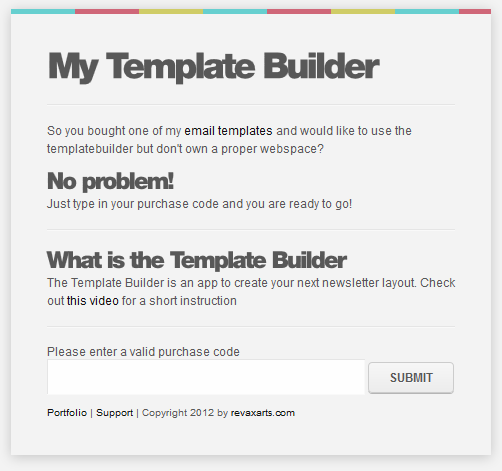
My Template Builder
With "My Template Builder" you can access the Template Builder without uploading the files to your webspace.
You don't even need a webspace!
1. Go to the "My Template Builder" website and enter your purchase code and hit the submit button
After you've submitted your valid code you can see all templates where you have entered a purchase code
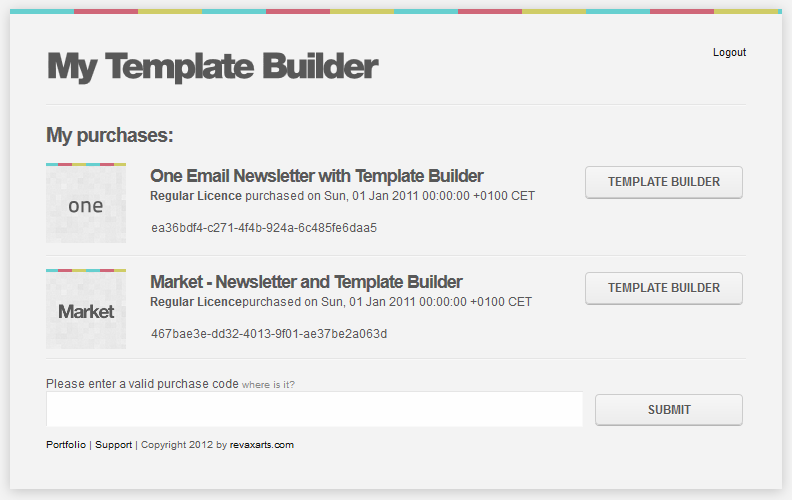
You can now start using the Template Builder by pressing the "Template Builder" button of your desired template
Try it know:
mytemplatebuilder.revaxarts-themes.com
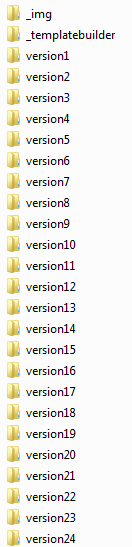
File Structure
Each version comes with this file structure:
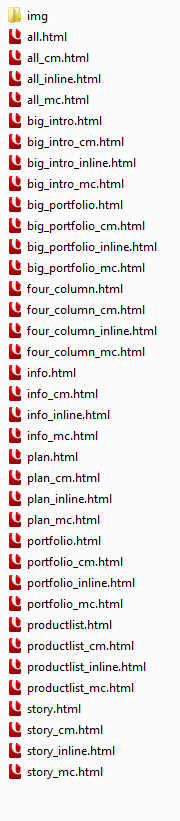
All images are in the img folder. For each layout you get 4 different html files:
- layoutname.html (is the normal file)
- layoutname_inline.html (is the normal file with inline CSS)
- layoutname_mc.html (is the Mailchimp version)
- layoutname_cm.html (is the Campaign Monitor version)
Mailchimp and Campaign Monitor will inline your CSS before you send a campaign, so no need to have it here
PSD/PNG Files
I've included several psds and pngs with this theme (png_psd.zip). All pngs are fully editable fireworks png
For each version you get:
- screendesign.psd
- screendesign.png
The screendesign.psd and screendesign.png are layered designs of the template.
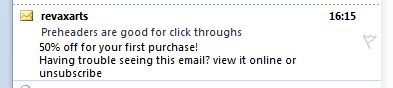
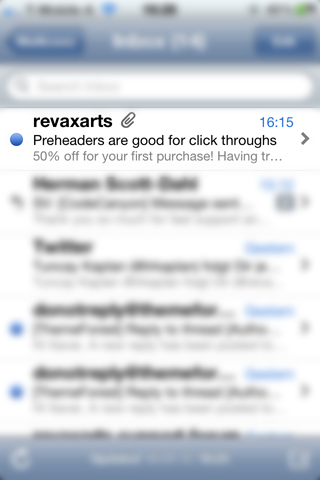
Preheaders
Preheaders are small phrases (up to 80 letters) which should help increasing your clickthrough rate. Many email clients display the first letters of an email in their preview area.
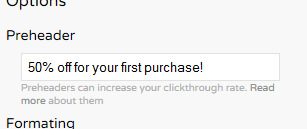
Preheaders are invisible in the normal email view and show up only in the preview pane of some clients
Examples
Outlook 2007 + 2010
Google Mail

iPhone
If you use Mailchimp or Campaign Monitor you can use there placeholder tags too!
Usefull resources
How to add a custom color
This Template comes with alot predefined colors. If you need your own color follow these steps:
- Get the hex value of your color (I use as example the value 123456)
We have to setup the file structure:
- Duplicate the folder 'version1' and rename it to 'version25'
- If you would like to use only the Template Builder open all four files which start with 'all_'
- seach for the old hex value '00A9E0' and replace all with your new (e.g. 123456)
Now we have to add the new file to the Template Builder:
- open the custom.js within the '_js' folder of the templatebuilder.
-
scroll down to colors and attach your hex value to the end position:
colors = ['00A9E0','...','123456'];
-
do the same for the background color:
bgcolors = ['00A9E0','...','123456'];
- Save the custom.js
Make sure you upload all your files to your server
Sources and Credits
I've used the following images, icons or other files as listed.
- Social Icons by Picons
- Photo used: Panoramic View Of Beautiful Skyscrapers And River by Yuri Arcurs
- MacBook: MacBook Pro Retina Psd Mockup by Pixeden
- iPhone: iPhone 4s Psd Vector Mockup Template by Pixeden
Files are maybe not included because of the license
Once again, thank you so much for purchasing this item. As I said at the beginning, I'd be glad to help you if you have any questions relating to this theme. No guarantees, but I'll do my best to assist. If you have a more general question relating to the themes on ThemeForest, you might consider visiting the forums and asking your question in the "Item Discussion" section.
Xaver Birsak – revaxarts.com
Social Media Icons
You can add one of 30 icons in the footer
You can purchase more of these beautiful ones over at Picons